
Painting your car is not just about making it look good. It is also an extremely important step in maintaining its technical condition. A well-done paint job returns the car to its original appearance and protects the body from corrosion and other negative environmental factors. However, in order to achieve this result, and to make it last as long as possible, there are many factors to consider. In this article, we will look at the main stages of preparation, share useful tips and warn you against common mistakes.
The main stages of preparing a car for painting
Preparing a car for painting includes several important stages, each of which requires a careful approach. Without performing at least one of them, the final result may be extremely poor and the paint will not stick to the car surface properly.
Protection of non-painted parts
Before starting work, it is necessary to protect all parts that will not be subject to painting – cleaning them will be more difficult than preventing paint from getting on them. Special materials are used for this purpose: painter’s tape and polyethylene film. The film should cover glass, headlights, mirrors, mouldings, chrome elements and other parts that are not subject to painting and cannot be removed. This will prevent paint from getting on undesirable areas and ensure cleanliness of the work.
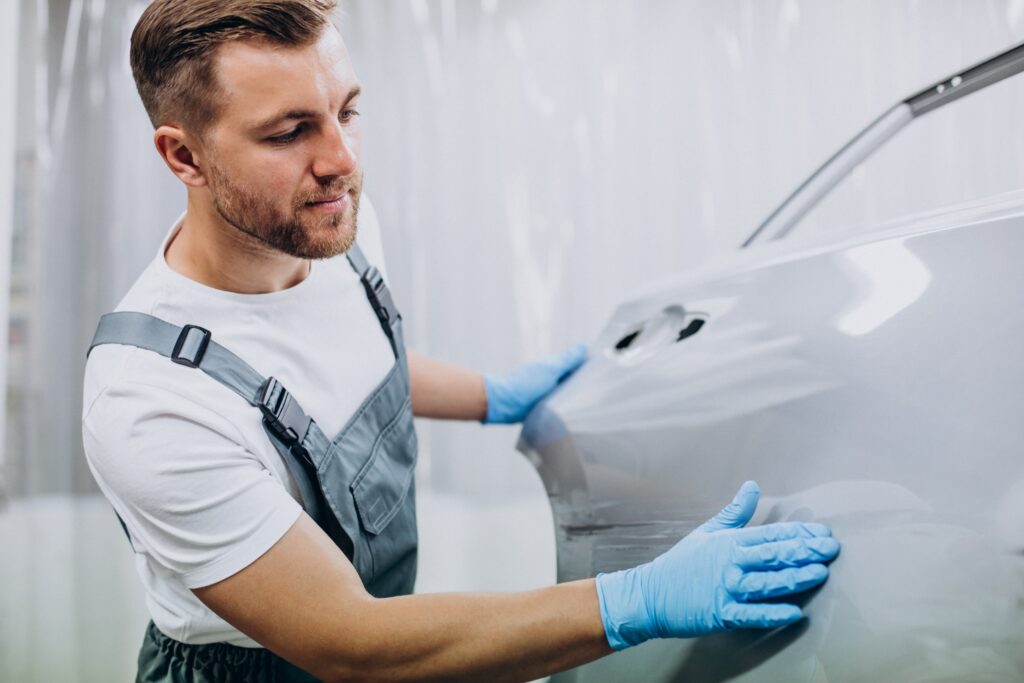
Car body cleaning
Bodywork cleaning is a very sensitive business, as it is not easy to remove dust, dirt and oil contamination from the surface of the car thoroughly – you can easily miss something. This process is important so that the paint can lie evenly on the surface without creating defects. Usually special car shampoos are used, which effectively cope with contaminants. Be sure to check for oil stains and remove them with degreasing agents.
Removal of the old coating
One of the most time-consuming preparation stages is the removal of the old paintwork. Depending on the condition of the surface and the thickness of the paint layer, different methods can be used. In some cases, sanding is sufficient to remove the old paint, but if there is a thick layer or damage, chemical agents or sandblasting are recommended. Particular care should be taken when dealing with damage to avoid catching the metal layer. In professional blasting, shot blasting equipment is used. It, when properly set up, is capable of providing the best quality and results.
Removal of rust and treatment of damaged areas
Rust is the main enemy of the car body. With a professional approach, rust can be removed by mechanical treatment such as grinding or the use of special chemicals. Of course, special attention should be paid to deep damage, if any. Once the rust has been removed, the surface is treated with anti-corrosion agents to prevent it from reappearing under a new layer of paint.
Surface grinding
The next stage is sanding. It is necessary for primer and paint to lie on an even surface, and it is almost impossible to achieve a perfectly smooth surface without special equipment and extensive experience. Special sandpaper of different grits, from coarse to fine, is used to achieve a perfectly smooth surface. You should start with coarser grit sandpaper and gradually move to finer grit. This will not only make the surface look even and beautiful, but will also ensure the removal of small defects and irregularities, which will give better adhesion of the paint to the body.
After sanding, the bodywork is degreased with anti-silicone and other products.
Car priming
Priming is a mandatory preparation step that helps to create a solid base for the application of paint. Primer improves the adhesion of the paint to the surface and also protects the metal from corrosion. It is important to apply the primer evenly over the entire body of the car, paying special attention to hard-to-reach places and areas where there was rust before. After applying the primer, it is necessary to let it dry completely. It is advisable to apply another layer of primer before applying the paint.
Checking readiness for painting
Before painting, it is necessary to ensure that the surface is completely ready. For this purpose, a visual inspection is carried out to check for any remaining defects, unevenness or unprotected areas. If all preparation stages are carried out correctly, the surface will be even and easy to paint on.
Common mistakes when preparing a car for painting
Mistakes that are made in preparation for painting a car are quite numerous and can only be avoided completely if you have sufficient experience, pedantry and a deep understanding of the work. The most common of them are:
- Lack of attention to minor defects.
Small dents, scratches and chips may not be noticeable before painting, especially if they are not checked with special equipment. However, as we mentioned, once fresh paint is applied, all dents and other nuances will become more obvious. If these defects are not eliminated at the preparation stage, the car will not look very good after painting.
- Neglecting to clean hard-to-reach areas.
Areas such as joints, corners and areas around door handles are often not cleaned sufficiently due to negligence. Dirt and old paint residue in these areas can lead to uneven paint application and premature paint flaking. And peeling can start much sooner than you think.
- Incorrect choice of grinding materials.
Using sandpaper that is too coarse or, conversely, too fine can have a negative effect on the result. Coarse sanding can leave deep scratches that will be visible after painting, while too fine sandpaper will not provide sufficient adhesion for the primer and paint. Therefore, a good understanding of which sandpaper to choose and how to sand the car before painting in general will be required.
- Haste to work.
Speeding up individual preparation steps, e.g. shortening the drying time of primer or paint, is likely to lead to defects in the coating. It is important to observe the technological pauses between stages so that each layer of material has time to dry and cure properly.
- Unsuitable working conditions.
Preparation and painting should be carried out in a clean and well-ventilated room with controlled temperature and humidity. Dust, moisture or too high/low temperatures can impair the quality of the painting and cause defects such as bubbles, streaks or peeling.
Is it worth repeating that just one mistake or a small saving of time and effort can wipe out or at least significantly worsen the final result, and any negligence is clearly not worth it? There is no way to fix the problem ex post facto, so you should not neglect any of the points we have listed.
Preparing your car for the paint booth is a complex and multifaceted process that requires, perhaps, further more attention than painting itself. Following the recommendations on how to prepare the car for painting and avoiding common mistakes, you will be able to provide your car not only an attractive appearance, but also excellent technical condition of its body, and all “red marks” will bypass it.